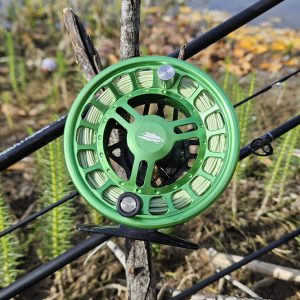
Attaching backing to fly reel is a crucial skill for any angler. In this guide, we’ll walk you through the process of properly lining your fly reel, ensuring you’re well-prepared for your next fishing trip. Whether you’re a beginner or looking to refresh your knowledge, we’ve got you covered with our easy-to-follow steps.
What is Backing and Why is it Important?
Let’s start with the basics, shall we? If you’re new to fly fishing, you might be wondering what backing is and why it’s such a big deal. Well, backing is essentially a thin, strong line that goes on your reel before your main fly line. It’s like the unsung hero of fly fishing!
The main purpose of backing is to give you extra line when you hook into that monster fish that decides to make a run for it. Without backing, you’d be limited to just the length of your fly line, which may not be enough for those long-distance battles.
When it comes to backing materials, you’ve got a couple of options. The most common types are Dacron and gel-spun polyethylene. Dacron is the old reliable – it’s been around forever and gets the job done. Gel-spun, on the other hand, is the new kid on the block. It’s thinner and stronger, which means you can fit more on your reel.
How to Choose the Right Backing for Your Fly Reel
Choosing the right backing isn’t rocket science, but there are a few things you’ll want to keep in mind. First off, consider the type of fishing you’ll be doing. Are you going after small trout in a stream, or are you planning to battle saltwater monsters?
For most freshwater fishing, 20-pound test backing is usually sufficient. If you’re going after bigger game or fishing in saltwater, you might want to bump that up to 30-pound test or even higher.
Also, think about your reel capacity. You want enough backing to fill the reel properly, but not so much that it interferes with your fly line. A good rule of thumb is to leave about 1/8 inch of space between the backing and the edge of the spool.
Step-by-Step Guide: Attaching Backing to Fly Reel
Now, let’s get down to business – attaching backing to fly reel. Don’t worry, it’s not as complicated as it might seem!
- Start by preparing your reel and backing. Make sure your reel is clean and your backing is free of tangles.
- Next, you’ll need to tie the backing to the reel. The arbor knot is a popular choice for this. Here’s how to do it:
- Wrap the backing around the arbor (the center part of the reel).
- Tie a simple overhand knot around the standing line.
- Tie another overhand knot in the tag end.
- Moisten the knot and pull it tight.
- Trim the tag end close to the knot.
- Now it’s time to wind the backing onto the reel. This is where patience comes in handy! Keep the backing under tension as you wind it on, making sure it’s evenly distributed across the spool.
- As you’re winding, periodically check for even distribution and tension. You don’t want any loose spots or bulges.
Connecting Fly Line to Backing: Best Practices
Once you’ve got your backing on, the next step is connecting it to your fly line. Often times, fly lines will come with double welded loops (meaning each end will have a premade loop for quick loop-to-loop connections, such as our weight-forward fly line).
If your line does not have any loops, you may need the albright knot which is a popular choice for this connection. Here’s a quick rundown:
- Form a loop in the backing.
- Pass the fly line through the loop.
- Wrap the fly line around both strands of backing.
- Pass the fly line back through the loop.
- Moisten the knot and tighten it slowly.
- Trim the tag ends.
Remember, the connection between your backing and fly line needs to be smooth. You don’t want any bumps or snags that could catch on your rod guides when you’re casting or fighting a fish.
Common Mistakes to Avoid When Lining a Fly Reel
Even experienced anglers can make mistakes when lining a fly reel. Here are a few common pitfalls to watch out for:
- Overfilling the reel with backing: This can interfere with your cast and cause tangles. Remember that 1/8 inch rule we talked about earlier!
- Using incompatible backing material: Make sure your backing is appropriate for your fishing conditions. Using lightweight backing for big game fishing is asking for trouble.
- Neglecting to check knot strength: Always test your knots before hitting the water. A failed knot can mean a lost fish (and a very sad angler).
- Improper tension when winding backing: If you wind your backing too loosely, it can slip and bunch up. Too tight, and you might damage your reel or reduce its capacity.
Remember, practice makes perfect when it comes to attaching backing to fly reel. Don’t be afraid to ask for help or advice from more experienced anglers. Before you know it, you’ll be lining your reel like a pro!
Conclusion
Attaching backing to your fly reel is an essential skill that can greatly enhance your fishing experience. By following our guide, you’ll be able to properly line your reel and ensure a smooth connection between your backing and fly line. Remember to choose the right backing for your needs and always double-check your knots for security. With these tips, you’ll be ready to cast with confidence on your next fishing adventure.


